Using yum to download an rpm but not install it.
mkdir /software/stage_rpms
chmod 775 /software/stage_rpms
yum install yum-downloadonly
yum update <packagename> -y --downloadonly --downloaddir=/software/stage_rpms
Using yum to download an rpm but not install it.
mkdir /software/stage_rpms
chmod 775 /software/stage_rpms
yum install yum-downloadonly
yum update <packagename> -y --downloadonly --downloaddir=/software/stage_rpms
Floor – Rounds down to the nearest whole number.
Example:
select floor(15.8666)
from dual;
15
select floor(-15.8666)
from dual;
-16
Ceil – Rounds up numbers to the greatest whole number.
Example:
select ceil(15.8666)
from dual;
16
select ceil(-15.8666)
from dual;
-15
Network Manager is a new feature that is designed to make networking easy. The network manager tool automatically connects to the best network in linux. Since this is a server and we will not be running wifi connections we wanted or connection to be static. We’ll shut off network manager and assign static ips.
Example:
sudo su – oracle
.oraenv
db11g_1
sqlplus / as sysdba
grant dba to scott;
grant unlimited tablespace to scott
expdp scott/tiger tables=schema.tablename1,schema.tablename2,schema.tablename3 directory=oracledump dumpfile=exp_schema_20130117.dmp logfile=exp_schema_20130117.log
sudo su – oracle
.oraenv
db11g_2
sqlplus / as sysdba
grant dba to scott;
grant unlimited tablespace to scott
impdp scott/tiger remap_schema=oldschema:newschema remap_tablespace=oldtablespace:newtablespace,oldtablespace2:newtablespace2 directory=oracledump dumpfile=exp_schema_20130117.dmp logfile=imp_schema_20130117.log
In a web browser
Sign into support.oracle.com
Choose patches
Enter patch number 10404530
Choose your platform
Choose download
Download all 7 files
cd /software
mkdir db/11.2.0.3 –p
chmod 777 db –R
cd ~/Downloads
cp *.zip /software/db/11.2.0.3
rm –f *.zip
cd /software/db/11.2.0.3
unzip *.zip
Purpose: Active links to important Oracle documents.
Documentation:
Oracle Release Schedule (ID 742060.1).
Current 11.2.0.3 database as of this writing (Patch 10404530).
Oracle users without support 11.2.0.1 Download.
Oracle 11r2 Database documentation.
Purpose: This tutorial gives some basic commands to work with Logical Volume Manager in Linux to create a new logical disk. Logical Volume Manage allows you to manage disks group logically separating the logical volume from the physical disk set. This make extending logical drives easy.
Video Demo:
Steps to create a new logical volume:
1. Partition the disk device
fdisk –l
fdisk -u /dev/<device>
n = new
p = primary partition
1 for first partition
default = beginning of disk
default = end of disk
w = write
fdisk –l
2. Create the physical disk drive
pvcreate /dev/<partition_name>
3. Verify the new physical name
pvdisplay
4. Create a volume group with the new physical disk name
vgcreate <volume_group_name> /dev/<partition_name>
5. Verify the volume group
vgdisplay
6. Divide volume group into logical volume groups
lvcreate -L <logical_volume_size>G --name <logical_volume_name> <volume_group_name>
7. Verify Logical Volume groups
lvdisplay
8. Format Disk
mkfs.ext4 /dev/<partition_name>/<logical_volume_name>
9. Make disk mountable for boot
# if this is disk will always be attached add it to fstab
#vi /etc/fstab
#/dev/<partition_name>/<logical_volume_name> /<directory_name> ext3 defaults 0 0
# if this disk will only be used this session just mount the disk directly
# mount /dev/<partition_name>/<logical_volume_name> /<directory_name>
# if this disk will be moved from system to system mount it using /etc/rc.d/rc.local
# This method will error the drive on the machine on boot if the disk
# is not attached but will not require a linux boot repair.
# vi /etc/rc.d/rc.local
# mount /dev/<partition_name>/<logical_volume_name> /<directory_name>
10. mount disk
mkdir /<directory_name> –p
mount /<directory_name>
cd <directory_name>
df -h
Example:
1. Partition the disk device
fdisk –l
fdisk -u /dev/sdb
n = new
p = primary partition
1 for first partition
default = beginning of disk
default = end of disk
w = write
fdisk –l
2. Create the physical disk drive
pvcreate /dev/sdb1
3. Verify the new physical name
pvdisplay
4. Create a volume group with the new physical disk name
vgcreate softwarevg /dev/sdb1
5. Verify the volume group
vgdisplay
6. Divide volume group into logical volume groups
lvcreate -L 79G –-name softwarelv softwarevg
7. Verify Logical Volume groups
lvdisplay
8. Format Disk
mkfs.ext4 /dev/softwarevg/softwarelv
9. Make disk mountable for boot
# if this is disk will always be attached add it to fstab
#vi /etc/fstab
#/dev/softwarevg/softwarelv /software ext3 defaults 0 0
# if this disk will only be used this session just mount the disk directly
# mount /dev/softwarevg/softwarelv /software
# if this disk will be moved from system to system mount it using /etc/rc.d/rc.local
# This method will error the drive on the machine on boot if the disk
# is not attached but will not require a linux boot repair.
# vi /etc/rc.d/rc.local
# mount /dev/softwarevg/softwarelv /software
10. mount disk
mkdir /software –p
mount /software
cd /software
df –h
This is a temporary post that was not deleted. Please delete this manually. (86d79719-8728-4ca4-982c-24afd3b81b1d - 3bfe001a-32de-4114-a6b4-4005b770f6d7)
If you are working with multiple servers you will want to find a central location to store your software. You can use a nfs or samba mount to a file server, or in virtual box you can create a disk device that can be attached to different systems that stores all you software and scripts. This tutorial goes over the second method of adding a second disk device to virtual box which will be used to hold software and scripts and can be easily detached and mounted on another system.
Step 1. Create new disk device
Video Demo:
Step 2. Restart server.
Step 3. Partition new disk
fdisk –l
fdisk -u /dev/sdb
n = new
p = primary partition
partition 1
default = beginning of disk
default = end of disk
w = write
Step 4. Create the logical volume
pvcreate /dev/sdb1
pvdisplay
vgcreate softwarevg /dev/sdb1
vgdisplay
lvcreate -L 79G --name softwarelv softwarevg
lvdisplay
mkfs.ext4 /dev/softwarevg/softwarelv
vi /etc/fstab
/dev/software/softwarelv /software ext4 defaults 0 0
Step 5. Mount Directory
mkdir /software
mount /software
Once the OS is installed and the system updated using yum, it is likely that you will want to set up some other basic system configurations.
In your newly created software directory we will create some scripts to standardize all your Linux bases. This scripts will create your base user accounts, configure firewall, set ntp servers and any other standard operations that you will perform on all servers. If you create your software mount as an nfs mount on another server you will always be able to access this from a new server and just run your post standardize scripts. If you create it on a logical volume in virtual machine like I have you can mount this virtual drive onto any Linux machine and kick of the scripts and access the software. Since this is a home instance I’ll be demonstrating using the attach virtual drive method, but an nfs mount or ocfs2 mount would be much easier.
These are basically the default tasks for all scripts. I’ll post the scripts for the software directory once we completely go through them.
Download scripts and unpack in /software directory
Post Install Scripts.
cd /software/scripts/osinstall/oel6up3_postinstall.sh
Or hand build scripts from below.
mkdir /software/scripts/libs/osinstall/1.0 –p
cd /software/scripts/
ln –s /software/scripts/libs/osinstall/1.0 osinstall
cd /software/scripts/osinstall
vi install_os_updates.sh
# Script Name: install_os_updates.sh
# Purpose: Verifies OS updates and standard packages are installed
echo "Installing OS Updates";
yum list updates
yum install sendmail -y
yum install tigervnc tigervnc-server-module tigervnc-server -y
yum install nmap -y
yum install vsftpd -y
yum install net-snmp -y
yum install net-snmp-utils -y
yum install lsscsi -y
yum install device-mapper-multipath -y
yum update –y
# End Script
vi check_root_user.sh
# Script Name: check_root_user.sh
# Purpose: Verifies the script is being run as root
USER=`whoami`
# Check to make sure the account is root
if [ $USER != root ]; then
echo "Must be root to run this script, please login as root and re-try"
exit
fi
# End Script
vi check_hostname.sh
# Script Name: check_hostname.sh
# Purpose: Verifies the hostname is correct and updates if not
HOSTNAME=`hostname`
echo "Verify Hostname"
echo "When using dhcp the dhcp server may assign an invalid hostname verify the correct hostname is set."
echo "Hostname: "$HOSTNAME
echo "Is "$HOSTNAME" the correct hostname? (y/n)"
read response
if [ $response != "y" ]; then
echo "Please enter the correct hostname"
read response
hostname $response
HOSTNAME=`hostname`
echo "Replacing hostname in /etc/sysconfig/network file."
old_hostname=`cat /etc/sysconfig/network | grep HOSTNAME`
echo "Old Hostname setting: "$old_hostname
if [ "$old_hostname" == "" ]; then
echo "HOSTNAME=$HOSTNAME" >> /etc/sysconfig/network
else
sed -ie "s/$old_hostname/HOSTNAME=$HOSTNAME/g" /etc/sysconfig/network
fi
new_hostname=`cat /etc/sysconfig/network | grep HOSTNAME`
echo "New Hostname setting: "$new_hostname
fi
# End Script
Firewall rules:
At first we are going to want to shut off firewall rules and disable selinux.
We can later change the firewall rules to allow just the traffic we need to operate.
vi /etc/sysconfig/iptables
-A INPUT -m state --state NEW -m tcp -p tcp --dport 5900:5910 -j ACCEPT
-A INPUT -m state --state NEW -m tcp -p tcp --dport 1521 -j ACCEPT
chkconfig iptables off
chkconfig ip6tables off
service iptables stop
service ip6tables stop
vi /etc/selinux/config
change SELinux=enforcing to SELinux=disabled
reboot
Purpose: Basic steps to release yum lock, when error “Another app is currently holding the yum lock” exists.
If you are sure you are not still running another yum install or update, you can get past this error by one of the following steps.
First try to just clean and rebuild the yum repository.
yum clean all
If cleaning the yum repository does not work you may need to kill the process that currently has yum locked.
sudo kill $(cat /var/run/yum.pid)
killall –9 safe_yum
yum clean all
Purpose: This tutorial provides the basic steps for resolving an “ORA-00257 archiver error. Connect internal only, until freed.”. This error is basically telling you that you have run out of room to write additional archive logs. This may be a disk space issue or a database limit issue.
Step 1. Log on to server
sudo su – oracle
. oraenv
<db_sid>
Step 2. Connect to Oracle as sys
sqlplus / as sysdba
Step 3. Determine size and location
select name, value from v$parameter where name in ('db_recovery_file_dest');
select name, trunc(value/1024/1024/1024) || 'GB' from v$parameter where name in ('db_recovery_file_dest_size');
Step 4. Check host if room is available increase dest_size
host
df –h
exit
Step 5. Increase size if disk is available.
ALTER SYSTEM SET DB_RECOVERY_FILE_DEST_SIZE = <new_size>G scope=both;
Step 6. Check Available area
select name, trunc(space_limit/1024/1024/1024) || 'GB', trunc
(space_used/1024/1024/1024) || 'GB'
from v$recovery_file_dest
order by name
/
Purpose: This tutorial shows basic steps to mount an nfs file system, create an Oracle directory, export data with expdp and reimport it into another database instance on another server using impdp.
This example expects high level access on both servers to create file systems, directories, mounts, and grant high level database privileges. There are other ways to perform all operations from a single instance without as much privilege but this doc does not cover them.
You’ll want to know several system settings or you will need to local them up. This items and examples are all listed below.
<local_nfs_mount> = /backup/oracledump
<nfs_mount_server> = nfsfileserver.snapdedo.com
<server_nfs_mount> = /backup/db/oracledump
<export_db_sid> = db11g_1
<import_db_sid> = db11g_2
<oracle_base> = /app/oracle
<oracle_dump_directory> = oracledump
<db_dir_name> = oracledump
<export_user> = jenkinss
<import_user> = jenkinss
<export_schemas> = schema1,schema2
<export_password> = abcd1234*
<import_password> = abcd1234*
<export_file> = exp_name_date.dmp
<export_log> = exp_name_date.log
<import_log> = imp_name_date.log
Export Server
mkdir <local_nfs_mount>
chmod 775 <local_nfs_mount>
mount -o hard,intr,noac,wsize=32768,rsize=32768 <nfs_mount_server>: <local_nfs_mount> <server_nfs_mount>
sudo su - oracle
. oraenv
<export_db_sid>
cd <oracle_base>
ln -s <local_nfs_mount> <oracle_dump_directory>
create directory <db_dir_name> as ''<oracle_base>/<oracle_dump_directory>";
grant unlimited tablespace to <export_user>;
grant dba to <export_user>;
grant sysdba to <export_user>;
expdp <export_user>/<export_password> schemas=<export_schemas> content=data_only directory=<db_dir_name> dumpfile=<export_file> logfile=<export_log>
Import Server
mkdir <local_nfs_mount>
chmod 775 <local_nfs_mount>
mount -o hard,intr,noac,wsize=32768,rsize=32768 <nfs_mount_server>: <local_nfs_mount> <server_nfs_mount>
sudo su - oracle
. oraenv
<import_db_sid>
cd <oracle_base>
ln -s <local_nfs_mount> <oracle_dump_directory>
create directory <db_dir_name> as ''<oracle_base>/<oracle_dump_directory>";
grant unlimited tablespace to <import_user>;
grant dba to <import_user>;
grant sysdba to <import_user>;
impdp <import_user>/<import_password> directory=<db_dir_name> dumpfile=<export_file> logfile=<import_log>
Example:
Export Server
mkdir /backup/oracledump
chmod 775 /backup/oracledump
mount -o hard,intr,noac,wsize=32768,rsize=32768 nfsfileserver.snapdedo.com:/backup/oracledump /backup/db/oracledump
sudo su - oracle
. oraenv
db11g_1
cd /app/oracle
ln -s /backup/oracledump oracledump
create directory oracledump as '/app/oracle/oracledump';
grant unlimited tablespace to jenkinss;
grant dba to jenkinss;
grant sysdba to jenkinss;
expdp jenkinss/abcd1234* schemas=schema1,schema2 content=data_only directory=oracledump dumpfile=exp_schema1_2_20130116.dmp logfile=exp_schema1_2_20130116.log
Import Server
mkdir /backup/oracledump
chmod 775 /backup/oracledump
mount -o hard,intr,noac,wsize=32768,rsize=32768 nfsfileserver.snapdedo.com:/backup/oracledump /backup/db/oracledump
sudo su - oracle
. oraenv
db11g_2
cd /app/oracle
ln -s /backup/oracledump oracledump
create directory oracledump as '/app/oracle/oracledump';
grant unlimited tablespace to jenkinss;
grant dba to jenkinss;
grant sysdba to jenkinss;
impdp jenkinss/abcd1234* directory=oracledump dumpfile=exp_schema1_2_20130116.dmp logfile=imp_schema1_2_20130116.log
Initially our base or vanilla OEL instance will use dhcp for network connections. Once we clone this instance into a database, application server, or management server we will want to switch this to a static ip. By default the Oracle Virtual Box will Nat traffic from your virtual machine out through your physical machines ip.If you have followed the steps in the previous tutorials your network card will most likely just not be connected. Follow these steps to set the network card to automatically connect.
Video Demo:
Step 1. Set Network card to automatically connect to network.
Left Click System
Choose Preferences
Choose Network Connections
Highlight System eth0 <—This will be the primary network interface.
Click Edit
Check “Connect automatically”
Click Apply
Click Close
Step 2. Check Network
Right click desktop
Choose open terminal
enter ifconfig into command prompt
Verify that a new ip address has been assigned
When looking for the latest server and packages updates you can use Oracle’s free yum repository or purchase a support license from $119-$1399. Support license vary in level of support but also provide additional Oracle specific packages. This tutorial walks through setting up the free yum repository to upgrade and add packages. One of the main benefits of yum is it’s ability to not only upgrade the package you have selected but it’s dependencies as well.
Documentation:
Oracle Linux Library
Oracle Linux Admin Guide
Yum Documentation
Step 1. Configure yum repository
cd /etc/yum.repos.d
## wget http://public-yum.oracle.com/public-yum-<release>.repo
wget http://public-yum.oracle.com/public-yum-ol6.repo 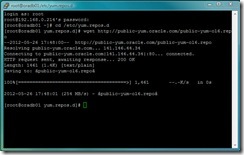
Step 2. Verify base yum channel is enabled
vi public-yum-ol6.repo
Verify that the latest is enabled by checking the “enabled” flag is set to 1 on the first entry “ol6_Latest”.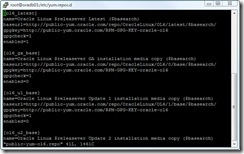
Step3. (optional) If you are using the UEK kernel you can enable the latest UEK kernel and UEK base repositories.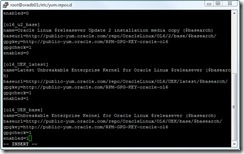
Step 4. Check yum channels are configured correctly
After verifying all repositories are enabled run a check.
yum list
A list of the Linux packages in the repositories you have selected should come back.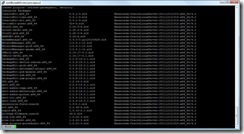
Step 5. Run test Install
Run a test by installing Firefox
I recommend using Firefox as a Linux browser since it will be the most supported browser for Linux.
yum install firefox -y
Agree to install, or if Firefox is already installed, it will say nothing to be done.
Step 6. Install Latest kernel headers for driver compatibility
I recommend install the gcc, kernel-headers and kernel-devel for modules which require kernel headers.
yum install kernel-uek-headers kernel-uek-devel gcc –y
Step 7. (optional) Install System Admin tools
(optional) Basic packages that will help administer the server. These packages are not required for Oracle to run properly but I will reference them in future tutorials and they provide some good testing and notification tools for the system admin.
yum install sendmail tigervnc tigervnc-server-module tigervnc-server nmap vsftpd net-snmp net-snmp-utils yum-plugin-security ethtool net-tools lsscsi device-mapper-multipath -y
Step 8. Update All packages for the yum repository
Linux adds new security patches and standard bug fixes almost daily. Even a new release will have many fixes within just a couple days, so your iso downloaded install should always be updated prior to running your new system.
update your current packages
yum update -y
Agree to install.
Purpose: Tutorial on basic steps of installing Oracle 32bit client on Windows 2008 Server.
Downloads:
Oracle 32bit Client – To download Oracle software you will need to accept a user license and create a free oracle account.
Steps 1. Unzip software
unzip win32_11gR2_client.zip to a directory.
Step 2. Browse to setup.exe
cd win32_11gR2_client\client
Step 3. Run Installer
Video Demo:
Step 4. Test Connection
Click start up
Click programs, oracle, application, sqlplus
right click send to desktop
right click desktop shortcut
Add <username>@'//<server>/<servicename>' to the start properties
double click and test login
Purpose: Easy steps for Installing Oracle Linux to prepare server for Oracle Products.
Video Demo:
Downloads:
Oracle Linux 6 Update 3 – Oracle Linux 6 is free to download. If you have an Oracle single sign on account you will simply login to dowload. If you do not you will need to register and accept a license agreement with Oracle to download software.
Prelude:
To perform this install I tested on oracle virtual box, running on top of a windows 7 machine. The same steps apply and have been tested directly on hardware. I used the dvd iso from the oracle download, but the same steps can be performed using the cd and a network image.
The Oracle Linux OS is an ease to install even if this is your first time installing Linux software. Users with Red Hat Linux experience will have an even easier time since this Linux has very few differences.
Steps:
1. Download DVD from Oracle.
2. Mount iso image and start machine.
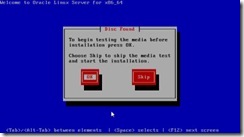
3. Media Check Screen
>> Choose to test the media if you have not already or skip.
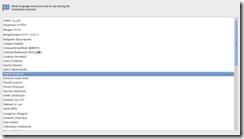
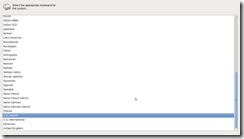

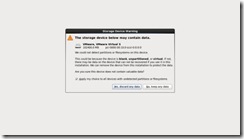


An additional screen may come up here if you use a weak password. For a test box the strength of your password may not be important but remember good practices for passwords. Password practices article.

12. Space Partition Screen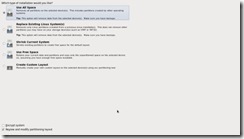
13. Partition Layout Screen
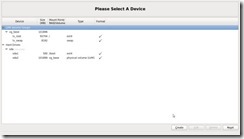
14. Format Warning Screen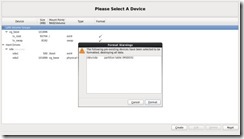
15. Write Partition Information to Disk Notice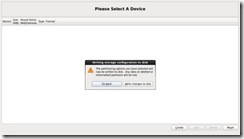
16. Boot Options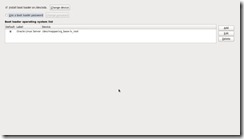
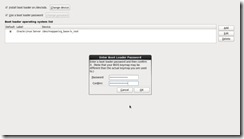
17. Boot Password
I highly recommend using a boot password if this is not a test system, if this is a test system you can skip this step.
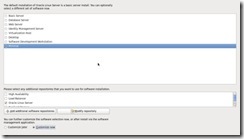
Choose a Minimal install and only install products needed to reduce security risks. It will be easy to add additional components in the next screen and even once the system has completed install.
Choose Customize Now to add the additional software packages need for an easy Oracle Install.
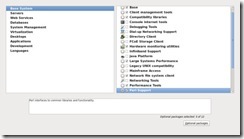
Base, Client Management Tools, Compatibility libraries,Hardware Monitoring utilities, Large System Performance, Network File System client, Performance Tools, Perl Support
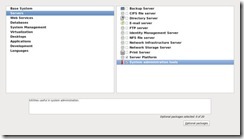
Server Platform, System Administration Tools
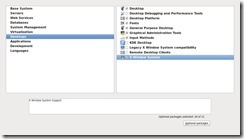
Desktop, Desktop Platform, General Purpose Desktop, Graphical Administration Tools, X Windows System
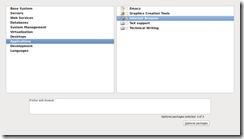
Internet Browser
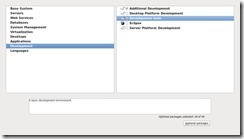
Additional Development, Development Tools
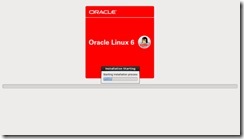
Be prepared to wait 5-60 minutes depending on the speed of your hard drive.
Dvd should auto eject and then you can manually reboot.

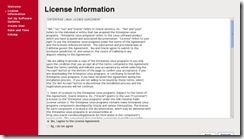
You can configure this later, or just use the oracle yum repo for testing.
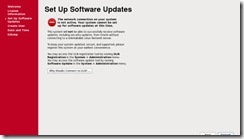
This screen may warn that you should not continue without a license but you can simply skip this warning.
Currently Oracle offers many levels of licenses for support. The Oracle Linux Product itself is free only if you wish for Oracle support do you need to buy licenses. Other benefits from licenses are patch sets, but the latest updates are available form the Oracle Yum Repository.
Current prices as of time off writing
$119 ULN – Patches only
$399 Oracle basic limited 2 cpus, 24x7 support
$1399 Oracle premier limited 2 cpus 24x7 support and additional features such as ksplice. Higher level of support is included.
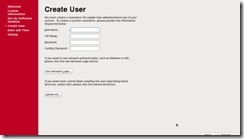
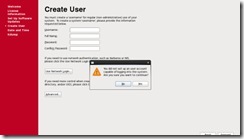
I script this step after install so I will skip this, but it is wise to have separate accounts rather then using the root administration account.
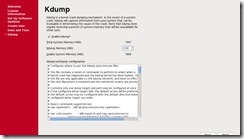
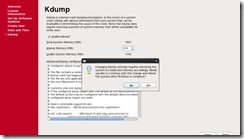
Kdump is a good feature to have, but not necessary for a test system. This reserves a small area of memory to be able to hold data if you have a system crash so that you are able to research this issue later.
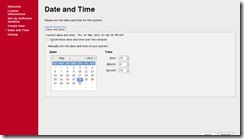
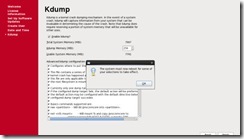
This is the final screen in the process.
Purpose: Tutorial on installing a third party Trusted CA into Oracle Wallet Manager. Oracle Wallet Manager manages certificates used by the Oracle database. The certificates can be used to authenticate with 3rd parties. Not all third party trusted CA’s are in the wallet and new ones are being created regularly. Adding a cert to the (OWM) Oracle Wallet Manager is an easy task.
This tutorial explains how to perform this task on a Linux server.
Step 1. From a vncsession on the local server start the Oracle Wallet Manager.
xhost +
sudo su – oracle
. oraenv
choose database
cd $ORACLE_HOME
cd bin
.owm
Step 2. Open the Wallet your working with.
right click wallet
choose open
enter password
Step 3. Import CA
Choose Operation
Choose Import Trusted Certificate
Paste New cert
Step 4. Verify Certificate shows up
Scroll certificate list and make sure it exists
Step 5. Sign Out
Right click wallet
choose auto login
choose sign out
choose exit
These tutorials provide quick and easy steps to practice working with Oracle 11G database software.
Tutorials:
Oracle database 11g release notes.
Installing Trusted CA into Oracle Wallet Manager (OWM).
Install Oracle 32 bit Client on Windows 2008 Server.
Export and Import Data Only across nfs mount.
Resolve ORA-00257 archiver error.
Export\Import list of Oracle tables using expdp impdp to another schema.
These tutorials provide quick and easy steps to practice working with Oracle Linux 6. Oracle Linux is a base Red Hat Linux distribution so it works in many ways the same as Red Hat Linux. There are several features that makes the Oracle Linux distribution appealing. The Oracle Linux release has several Oracle based features such as ASM, KSPLICE, and OCFS2. These features are no longer available in base Linux distribution. OEL is an acronym used for Oracle Linux. Almost all of the tutorials on this site will work equally as well on Enterprise Red Hat Linux. Oracle has a slightly lower base cost with a ULN license costing just over $100 dollars, and a free OEL 6 distribution that can be used for testing.
Tutorials:
Installing Oracle Linux 6 on Virtual Box
Resolve yum lock
Creating disk group with logical volume manager (LVM)
Yum Download rpm do not install.
Purpose: This tutorial will show you how to configure Oracle Virtual Box to boot from a ISO.
Purpose: This tutorial will walk you through the basic steps to install Oracle Virtual Box on a Windows 7 machine.
Downloads: Oracle Virtual Box Software
Steps;
1. Download Oracle Virtual Box from Oracle’s website.
2. Right click installer.
3. Installer will ask some basic system questions.
Purpose: This tutorial will walk you through the steps to create a basic Virtual Box Image to install Oracle Linux 6 OS and additional Oracle products.
Oracle Linux is an ideal product to use for Oracle database and application server installs. Oracle has add additional features to its branded Linux that allows you to more easily install Oracle components. Some of the features include ASM, OCFS and KSPLICE. These features are available for a small paid subscription. You can use the generic Oracle Linux to test and learn Oracle by free download.
Purpose: This tutorial will walk you through the steps of installing Oracle Linux 6 on Oracle Virtual Box. This configuration will give you a base install that can be modified to support many different oracle products quickly and easily.
1. Install Oracle Virtual Box software
2. Create a Virtual Box Image
3. Configure Oracle Linux 6 ISO as primary cd/dvd drive
4. Install Oracle Linux 6
5. Configure Network for dhcp
6. Configure Oracle yum repository
7. Mount Software file system.
8. Oracle Linux Post Install Steps